
LLMs are nowhere near this post.
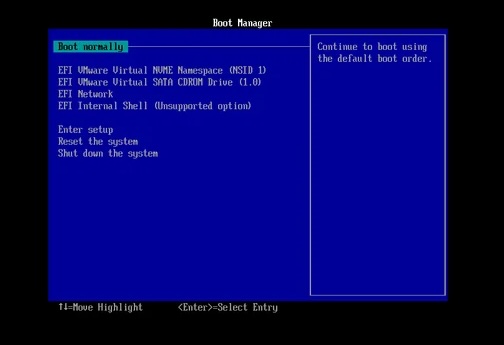
I recently encountered a situation where my Ubuntu 24.04 VM was failing to boot. The blue screen DOS-style Boot Manager would be displayed and booting was halted here, with an implicit ‘you shall not pass’. This post covers how i addressed the problem,
Here is my setup:
- Apple MBP M4
- VMware Fusion 13.6.3
- VM – Ubuntu 24.04 Server ARM
Maybe this article is not for you – here’s a quick summary to help you decide for yourself; create an Ubuntu ARM Server (Server was the only ARM version in Ubuntu town) bootable disk, attach the USB drive to the VM, boot from the USB drive, break out of the Ubuntu Server install and drop to a shell (this was not straightforward – see below), mount the correct /dev devices on /mnt and /mnt/boot/efi, along with dev, proc, etc directories. From here there’s one or both of two deviants who are liikely guilty – GRUB corruption, or kernel corruption. In my case it was GRUB corruption and the fix is below…
The Bootable Disk
This was a very helpful article: Create a bootable USB stick on Ubuntu – this should have got you all the way to a bootable USB drive. The iso to use is of course the ARM server version if you on M1-4 Mac. At the time of writing there is no Ubuntu Desktop 24 for ARM architectures.
Connecting Your USB Drive To Your VM
Having followed the link Create a bootable USB stick on Ubuntu , you will have got your MBP to recognise the USB drive. Boot your VM. You may not see the USB as a selectiable boot drive in the top menu, in which go down to ‘Reset The System’. This worked for me. Boot from the USB drive.
Ubuntu ARM Server install Breakout
You should see the following Grub screen …
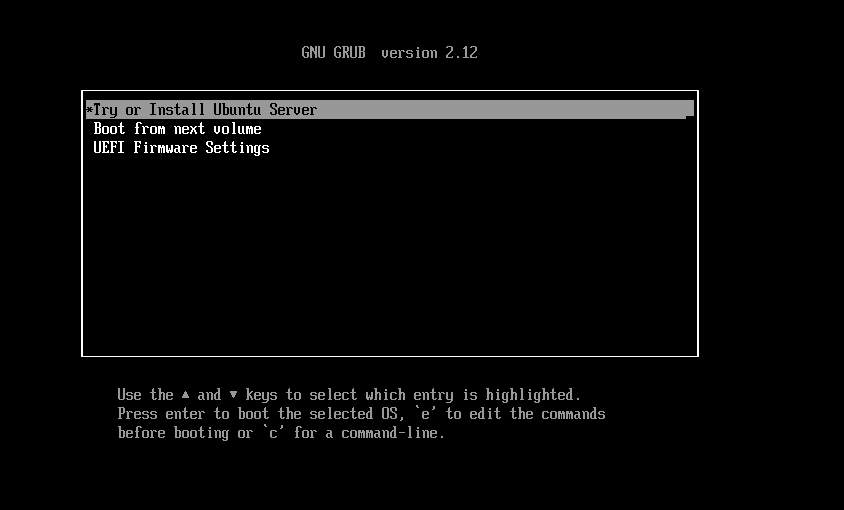
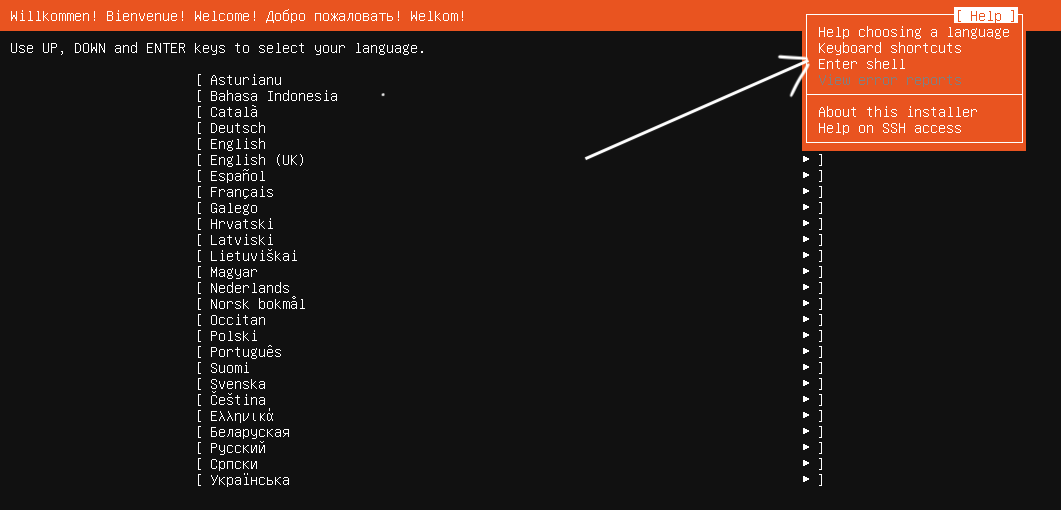
There is an option there – ‘Try or Install Ubuntu Server’. The menu is lying to you – do not believe it. There is no ‘try’, there is only install. Unless you find an off-script way to break out. Hit enter for the try/install option and then select the help option in the top right (as below), within which menu there is a shell option …
Mounting Your Ubuntu Drive and Repairing Your GRUB
Entering the shell, you are in a world where you are running a shell of the OS from the USB drive. You are not yet on the planet you want to be on, which is your broken Ubuntu 24 partition.
List your devices
From the shell prompt use the command:
lsblkThis will list the filesystems by device. One of them will be your boot partition, another will be the device that holds your broken VM’s root filesystem. In my case the 2 partitions of interest were /dev/nvme0n1p1 and /dev/nvme0n1p2, the latter of which is my root partition.
Mount these two partitions
mount /dev/nvme0n1p1 /mntmount /dev/nvme0n1p2 /mnt/boot/efi
You should see your famiiliar old files and directories under /etc and /home.
Mount the necessary system directories:
for i in proc dev sys; do mount --bind /$i /mnt/$i; done
Chroot into your not-booting VM:
chroot /mnt
Post-chroot Diagnostic Steps
Re-install the kernel…
apt updateapt install --reinstall linux-image-generic
Check the contents of the EFI folder:
ls /mnt/boot/efiYou should see something like this:
EFI/
└── ubuntu/
├── grubaa64.efi
└── grub.cfg
If the directory is empty, you need a GRUB fix…
Hopefully you don’t need to reinstall GRUB. This should be enough:
update-grubTo re-install:
grub-install --target=arm64-efi --efi-directory=/boot/efi --bootloader-id=ubuntu --recheck

update-grub
in my case i did not need to re-install GRUB, the update was sufficient.
Restart
umount /mnt/boot/efi
umount /mnt
reboot